Brantwood Gardens Craft Olympic 2

Ruskin’s Seat in Brantwood Gardens.
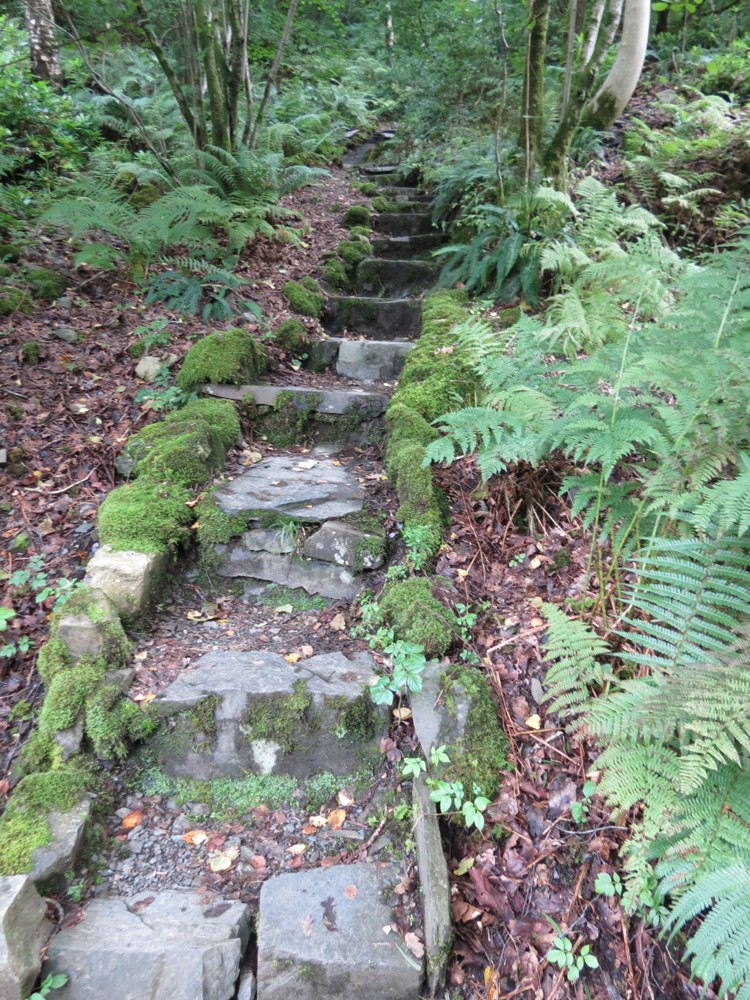
You get to the different areas along paths like this up the hillside.

This photo was my fav of the day with a friendly peacock butterfly on a hydrangea.

Wooden hand sculptures were scattered in the woodland.


Ruskin’s Pool

We had a map to make sure we didn’t miss any of the important areas within the 250 acres.

In the lower gardens near the lake there were a lot more flowers.

I was looking forward to seeing the herb garden the most.

Sadly I was too late in the year to see it in abundant flower.

There were some useful notes though on how the herbs were used. The beds were created according to use.


Looking up at Brantwood.

Beautiful colours of very late August.

Guess who popped over?

Yes the gorgeous Gondala!

Ruskin created this harbour. You can see Gondala’s jetty in the background.

This area for a boat is to the left of the harbour. I wonder if Ruskin planned to have a boat house here.

Click to read.

Ruskin’s boat

Ruskin’s carriage

Ruskin rowing. You would neber guess that blue from the pic.

I think this is Ruskin’s cousin’s family and their sail boat.

The boats moored in the harbour.

The view of the lake hasn’t changed a bit thanks to the National Trust. The Peter Rabbit books by Beatrix Potter helped fund it.

These cottages are available to rent for holidays here.


But we for now will go past the coach house to the Jumping Jenny Cafe and have a much earned cup of tea and slice of cake.
Family News

Talking of cake- Daughter had a 20th Un-Birthday. Her real birthday isn’t until October when she is at uni, so we gave her a little home-party

With the opening of things like Zombie Killing T shirt, killer heels (killing more like- well I never!!!) and leggings. Watch out any zombies in Portsmouth!
We delivered her to uni and had guests over the weekend. I am now catching up with the rest of you.
Craft News
Quick Make Idea

These lavender bags were a quick make for a friend in hospital. I thought they would help her relax and give her nose a break from the disinfectant smell.

Make 3 one each an inch smaller than the last square, then wrap together in a double bow. You then tie the single ends together to make a big loop which can hang on a hospital bed or in a wardrobe.

I have some future projects ready to hand sew on the slab.

I showed you the wet felting project and How-To last time. Above you can see I combined a bit of needle felting to a Nono Felted sample to make these lollipop flowers.

I can imagine using this technique to create textured scarves in the future. For needle felting you just need a needle, base and some roving. You place the fibre where you want it and push the needle in. The needle is full of little barbs like a tanged arrow head so it drags the fibres into the background cloth. There are some good video links here.

I’ve only to look out of the window to feel that it is Autumn.

This is what my final sample of wet felting turned out like.

I needle felted veins of the big leaves and used Perle 5 embroidery thread on top. The leaves were rolled and pinned while wet, so they would have a curled shape.

Green yellow and brown blended roving made the shapes of the smaller needle felted leaves. Again I used perle 5 to embroider veins on them.

The back has a hanging loop.

The centres of the orange cut aways were wet felted in green. I tried to make them look a little like the stumps of sawn off branches.

Leaf close up.
These 3 wet felting samples- Jellyfish (in last blog post) Nono Felting and the Autumn wallhanging are my challenge for my 2nd Craft Olympic Thimble. If anyone has done a thimble challenge but I haven’t linked it in my sidebar, can you please let me know.
The guidelines for the Craft Olympics are here at the bottom of the post

Lastly a final sneak peek of a finished Christmas present.
More Christmas sneak peeks of another present next time.
Posted in Uncategorized by House Elf with 7 comments.
Brantwood House, 1st Thimble + Felt Week.

Welcome to Brantwood the home of John Ruskin (1819-1900) on the east bank of Lake Coniston in Cumbria. He bought it in 1871 and then the surrounding land of Lawson Park in 1897.
He was an academic from Oxford and most often thought of in connection with the Pre Raphaelite Brotherhood. He wanted to restore the craftsman’s dignity in an age when industrialisation was creating slums for factory workers. He wanted to make the world a better place for the poor with welfare reforms. In this area he encouraged lace making which combined a lace effect with pulled work. There was an exhibit but no internal photos were allowed.
I really hate it when properties say that!
However I can show you my fav room of the house- Ruskin’s Study thanks to his friend Collingwood’s painting. They have reproduced the wallpaper in this room based on a photo and Ruskin’s design. The fireplace (with Della Robbia’s Virgin and Child sculpture above it) is to the right of that sketch. Here it is in a sketch by Arthur Severn.

Son liked the sitting room best. People who could play were invited to play the piano in this room.
Ruskin initially had the bedroom to the left as you come up the stairs, with the little turret just big enough for a chair, in the shape of a lantern added on by him. He had some sort of a breakdown and was unable to sleep in the room so swapped to the bedroom to the right of the stairs. This felt to me like a much more secure snug room as it feels protected by the mountain rather than exposed to the lake and wind.

This is the new entrance but was the back of the house originally. The horse and cart would’ve dropped people at the entrance and then continued through the archway not quite in shot to the right of the photo.
This photo shows the dining room with a flat top of the roof on the left which Ruskin designed. The narrow windows have a beautiful view down the lake.


As you saw in the previous post, Brantwood is built into the side of the hill, so we’ve gone up these steps to the Studio which Ruskin had built for his cousin’s husband, his friend Arthur Severn.

This is the studio- shall we go in?

The hallway to the studio window.

Window details -white rose stained glass.


The room itself has the same stule of roof as the dining room Ruskin added. Instead of roof slates though, it has a roof light, so the studio gets good light throughout the day.

The window openings are small on the outside but made in a Medieval style to let in as much light as possible.

A woodburner in the fireplace.

Larger windows for the views of Lake Coniston.

Now check out this old radiator!

Such attention to detail! This room originally had its own boiler to keep it warm in Winter.


I wonder what chats Ruskin and Severn had in front of this fire?

Just by the door is a sink – essential for any artist.

And a towel rail.
But let us go back down those steps and through the archway.

Ruskin diverted a spring below the studio and into this trough.

We are now round the other side of the house.

Original entrance.

Just opposite it Ruskin arranged for this waterfall so he would always have a beautiful view from the door instead of just the mountainside.

We can climb up and see the turret room Ruskin added to his initial bedroom to overlook the Lake. The Jumping Jenny tea toom is in the background. Part of it houses Ruskin’s boat and carriage. Will share another time.

But we climb below the house. The left part was added by the Severn family after Ruskin’s death. He wanted the house to be open for everyone to see his art collection. Sadly his last wishes weren’t respected and his art was sold and the house added to.
The square bay is the window for the sitting room.

The ground floor windows are for the study, and the bay to the right is for the drawing room built by Ruskin. You can see how the turret window was added to what was once a modest cottage. The upper window to the left of it is the original bedroom window.

Here is an older photo of this side of the house with less additions.

I will share the grounds next time.
Craft News
1st Craft Olympic Thimble

The 1st of my Olympic Challenges is complete- a punch needle design. I think the loops should’ve been smaller with hindsight but I followed the instruction settings in Lynette Anderson’s book. A lot of the small details like the bobbins and bone on the ground have been lost. I promise I stayed in the lines and did the little bits first. Anyone got any useful tips for how to improve?
I think I have remembered why I don’t do this craft much- my hand kept cramping up holding the punch needle.

This is what I am working on for my 2nd Thimble. It is a 3 part project of wet felting.
The above is inspired from a photo (below) where the jellyfish was photographed from below looking up to the sky. Click to see the silver jellyfish.
The felt was made from merino roving.

Wet Felting How To
What You Need
- Bamboo mat -the sort for making sushi is fine.
- 2 pieces of bubble wrap- one for the top and one for the bottom .
- Soap flakes disolved in hot water- as hot as you can stand – in a watering can.
- Merino wool roving in assorted shades
- Odd little bits and pieces such as threads for fine details
- Towel to cover your workspace.
Instructions
- Put the towel down -double thickness if big enough.
- Put the bamboo mat on top of it.
- One layer of bubble wrap with the bubble part facing you.
- Start pulling fluffy bits from the strand of roving keeping the strands facing across the bubble wrap.
- When the area is big enough (allow for a lot of shrinkage) start a new layer at 90 degrees to the last.
- Build up 4 layers of warp and weft (alternating direction of the fibres).
- Sprinkle with your watering can (a plastic bottle with holes in the lid is fine).
- It will now dampen down and look less like a hayrick.
- Layer the other sheet of bubblewrap with the bubble side down facing the roving.
- Sprinkle some of the soapy water on top of the bubblewrap and gently ease out any air.
- Massage gently to begin the felting.
- Lift the bubblewrap and add any details. If these aren’t made from roving, place some the same colour as the background, lightly over the pieces to embed them within the felt, but so they can still be seen.
- Repeat the massage process making sure the back of the felt is wet with soapy water- lift and sprinkle if necessary.
- When you are happy with the way it is looking, put the bubble wrap back and roll the bamboo mat and roll as if you are making pastry with a rolling pin.
- Unroll and move the felt 90 degrees so it will be shortened and felted in that direction too. Count how many of each way if it is important to keep the size ratio the same.
- Keep up the process and alternating until the work is the size and thickness you want.
- Rinse off the soapy water and leave to dry naturally.
- When dry you can then add small details with needle felting, machine embroidery, beadwork etc.

The above piece is Nuno Felting. This is where you lay a very fine layer of roving onto a lightweight fabric like silk or more cheaply a muslin scrim. You only have a bottom bubble wrap but the process is the same. The fabric is pulled into a seersucker texture where the roving is felting up. This piece is unfinished. I want to add needle felted flowers to it.

This is my 3rd piece. I wanted to know how to make pockets and cutaways. This is going to have a lot of embelishments before it is finished.
Making Pockets
- To make the pockets, you make your 4 layers of roving as above. (orange)
- Dampen down with soapy water.
- Add details you want to have revealed. (green)
- Cover the details with hard plastic, or the thin foam packaging bag.
- In a contrasting colour (brown) add 4 layers of roving, making sure the 1st layer alternates with the last of the previous colour.
- Felt as before.
- When finished rinse the soapy water off.
- Cut around the plastic, or across for a pocket to remove the plastic. You will be able to feel this.
- If you want any of the cutaways to be shaped then pin them while wet.
- Leave to dry naturally.
- Embellish as necessary.

And here is another sneak peek of my dry felting.
I hope I have inspired some of you to have a go yourselves. I am amazed at the ideas I have for using this technique. A whole new world of possibilities has opened up. If you want to make shaped flowers, you can make your own colour felts with details on the petals. Just shape while wet. The stem is make by just having a row of alternating roving and using just the bamboo mat to roll it firm.
This is the perfect craft to do while the weather is bad and you want a bit of a change from the sewing machine. Your imagination is the only limitation.
If anyone has finished a task for their 1st thimble, please let me know and I will link the blog post in my sidebar so everyone can encourage one another.
Happy Elfing!
Posted in Uncategorized by House Elf with 12 comments.